Initialize a GitHub Repo
Before we start working on our app, let’s create a GitHub repository for this project. It’s a good way to store our code and we’ll use this repository later to automate deploying our app.
Create a New Github Repo
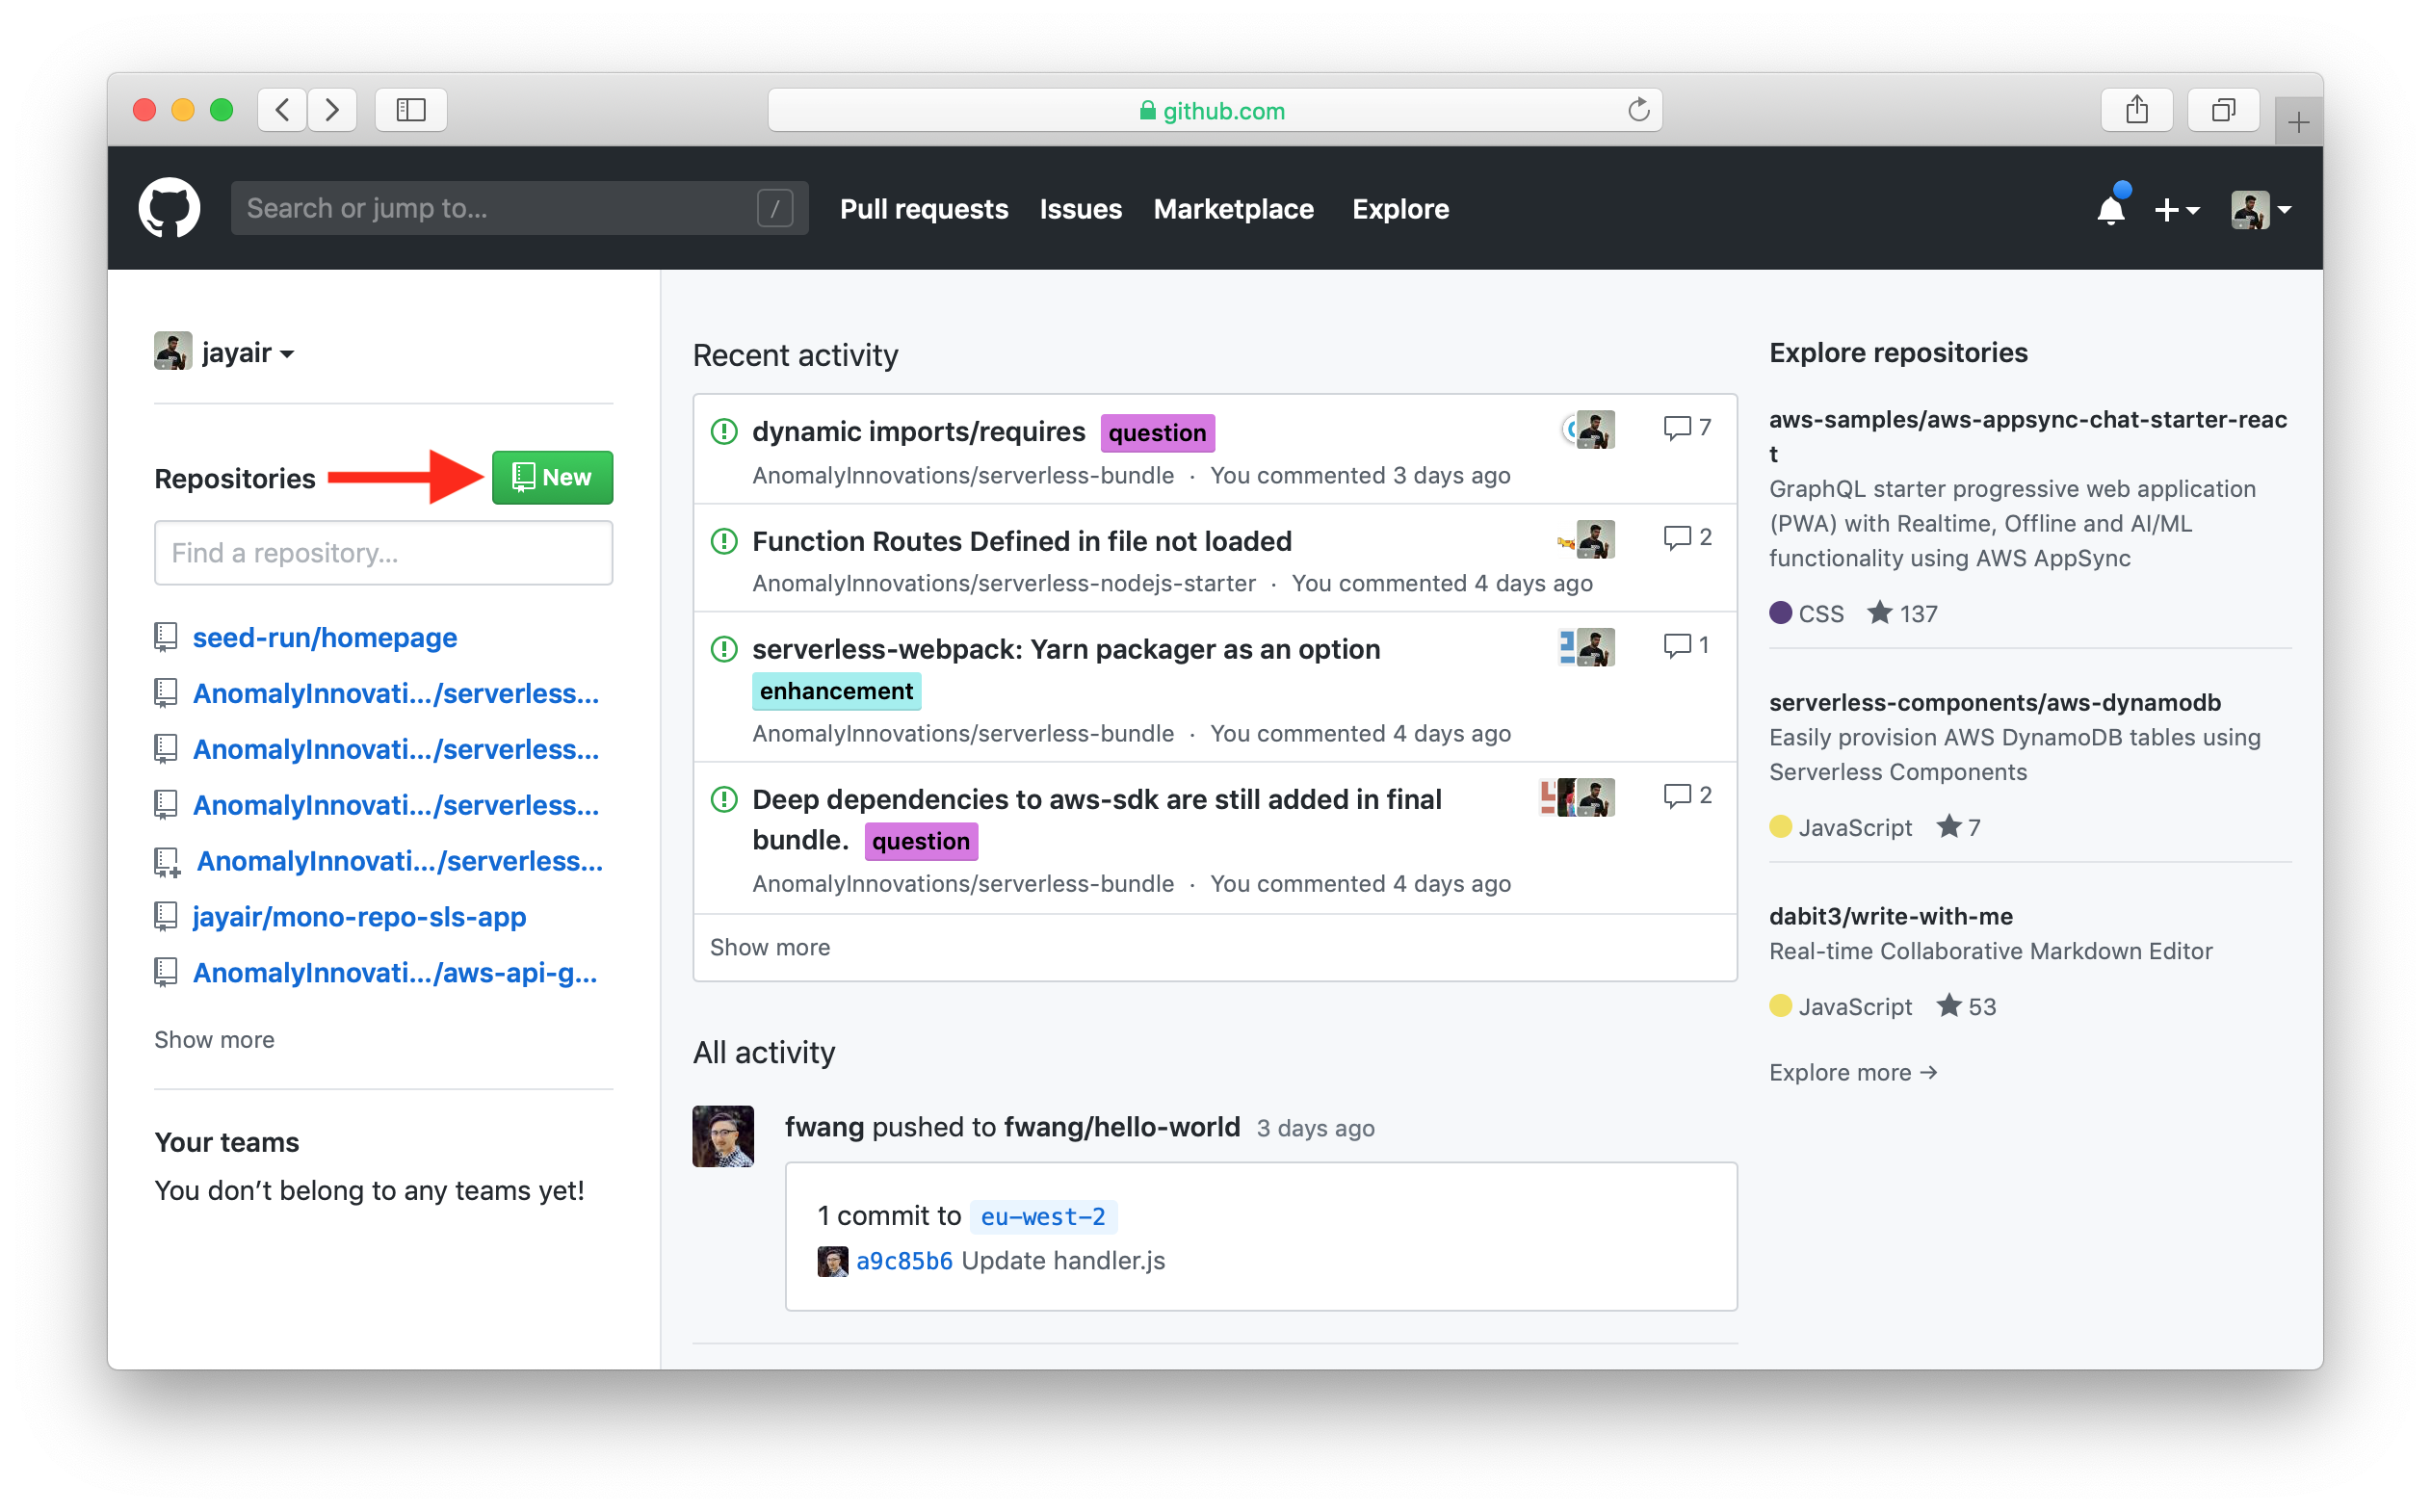
Let’s head over to GitHub. Make sure you are signed in and hit New repository.

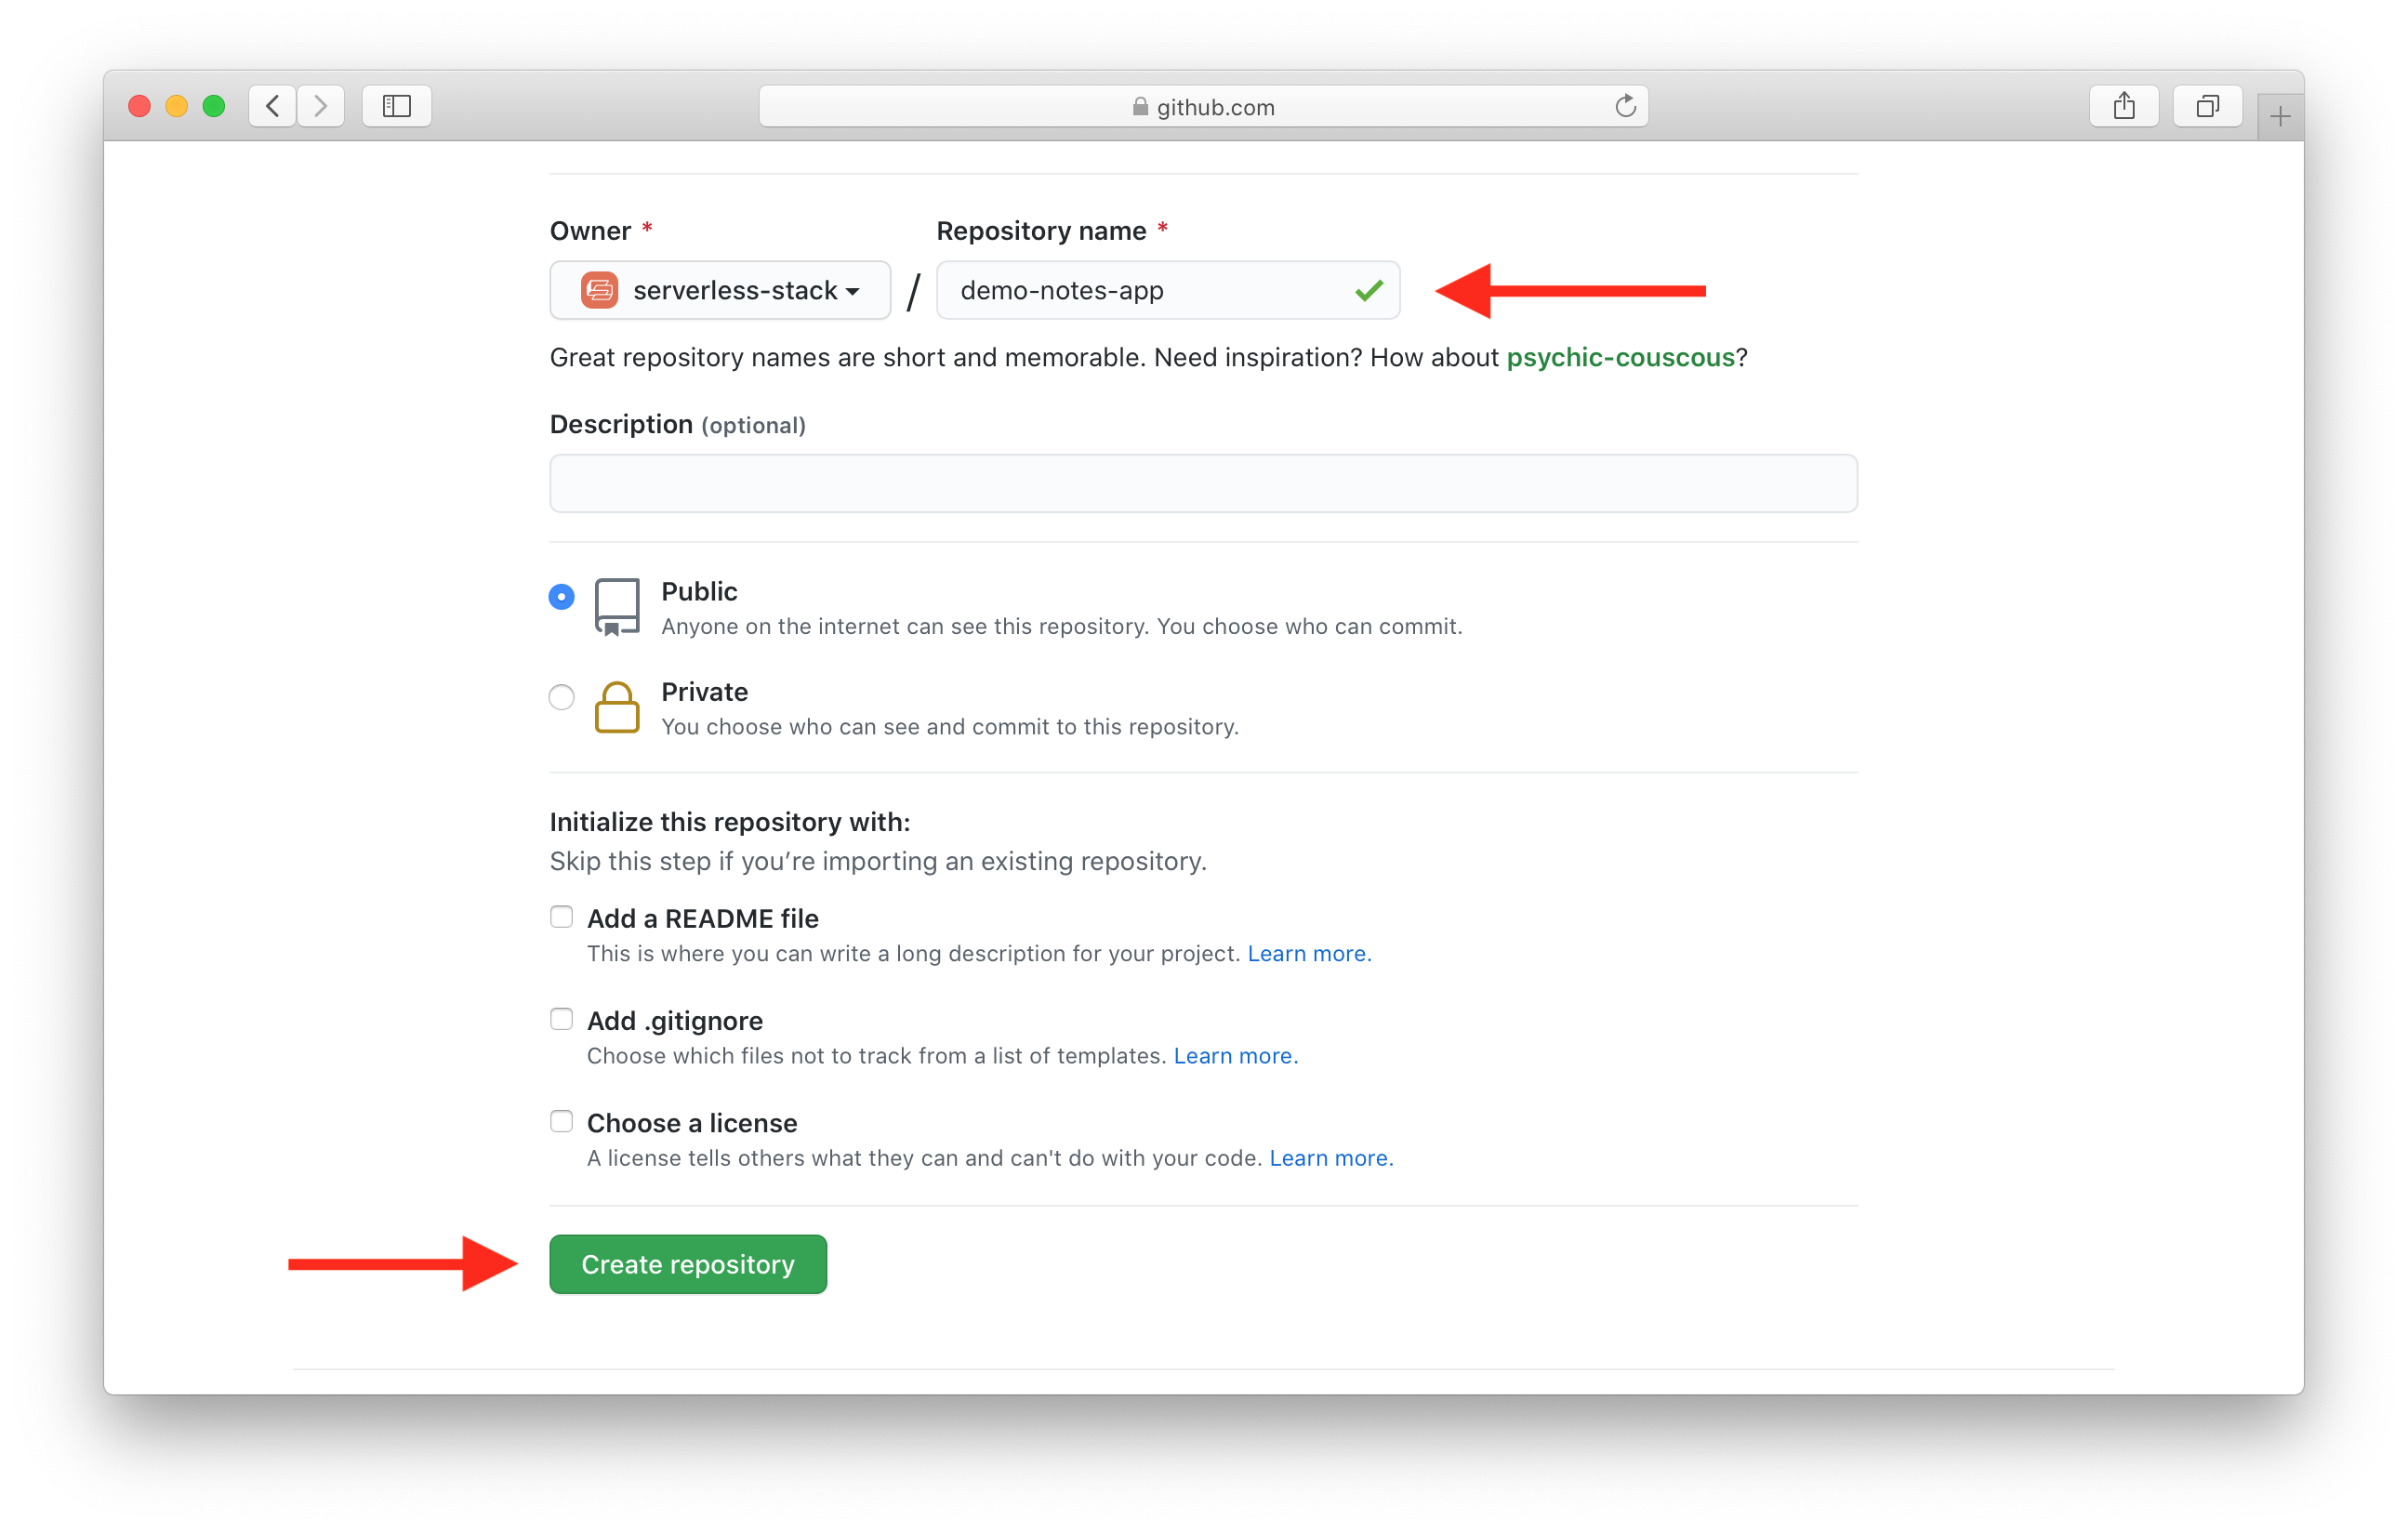
Give your repository a name, in our case we are calling it demo-notes-app. Next hit Create repository.

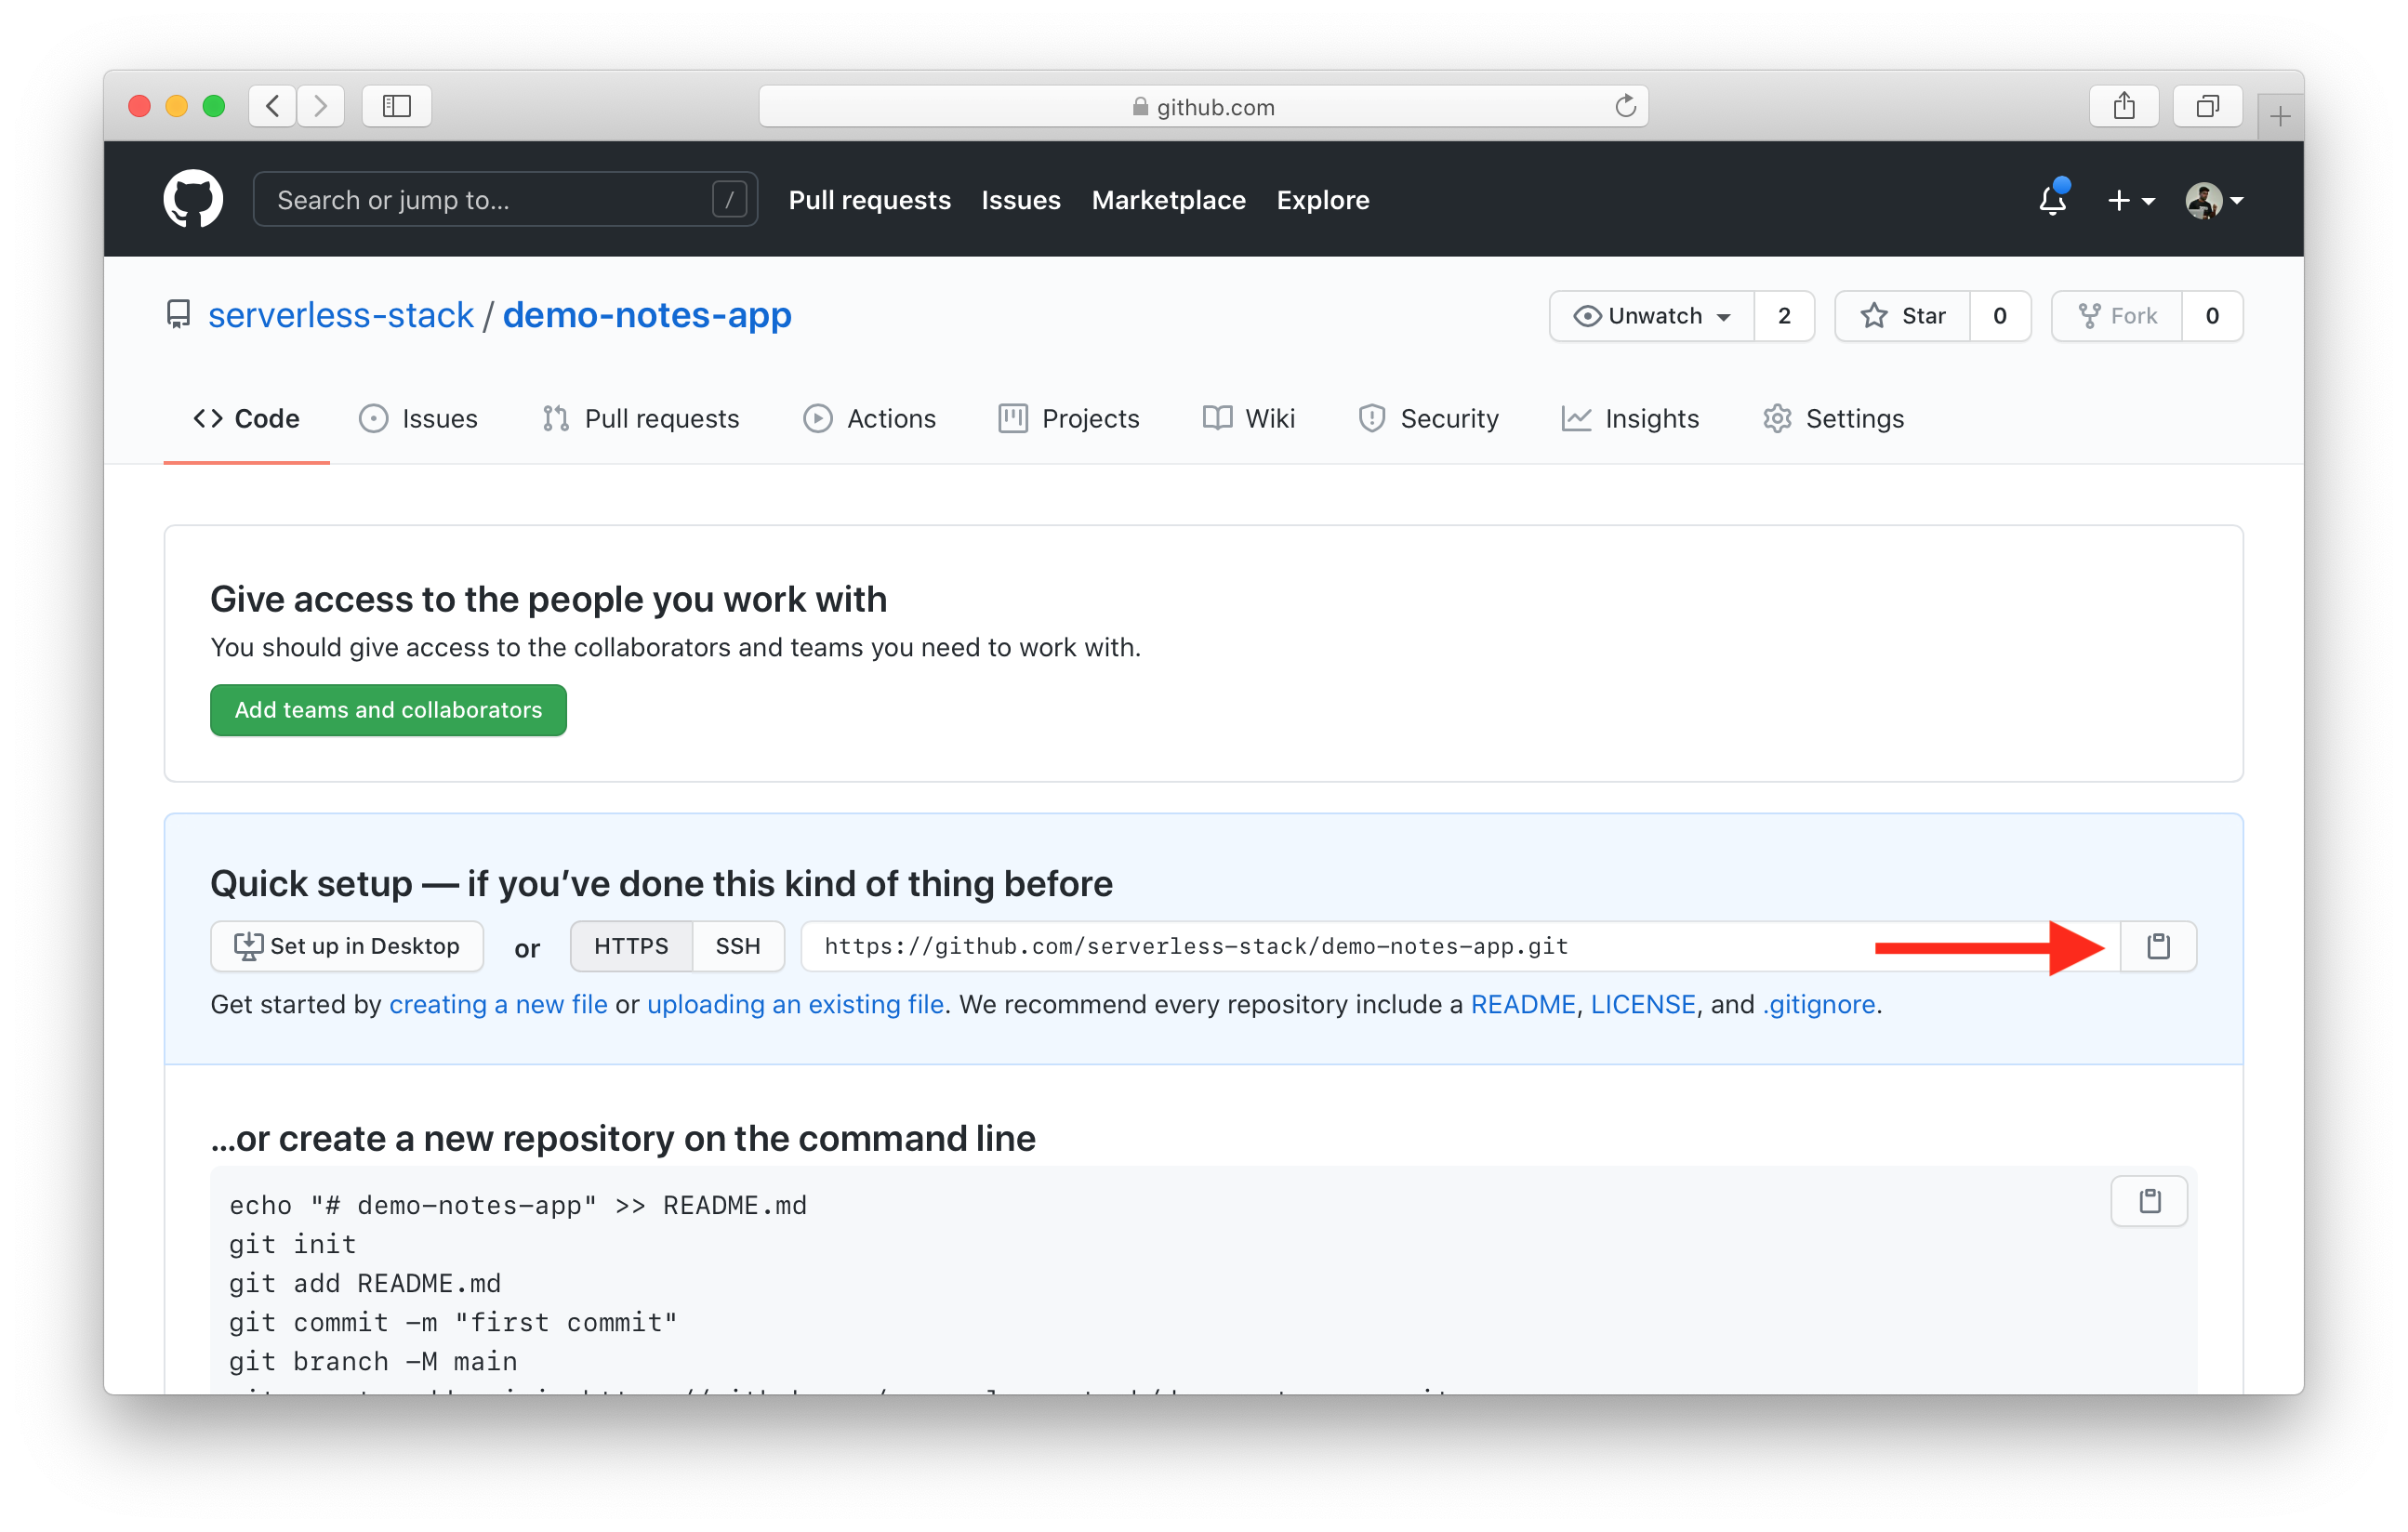
Once your repository is created, copy the repository URL. We’ll need this soon.

In our case the URL is:
https://github.com/serverless-stack/demo-notes-app.git
Initialize Your New Repo
 Now head back to your project and use the following command to initialize your new repo.
$ git init
 Add the existing files.
$ git add .
 Create your first commit.
$ git commit -m "First commit"
 Link it to the repo you created on GitHub.
$ git branch -M main
$ git remote add origin REPO_URL
Here REPO_URL is the URL we copied from GitHub in the steps above. You can verify that it has been set correctly by doing the following.
$ git remote -v
 Finally, let’s push our first commit to GitHub using:
$ git push -u origin main
Now we are ready to build our backend!
For help and discussion
Comments on this chapter


