Create an IAM User
Once we have an AWS account, we’ll need to create an IAM user to programmatically interact with it. We’ll be using this later to configure our AWS CLI (command-line interface).
Amazon IAM (Identity and Access Management) enables you to manage users and user permissions in AWS. You can create one or more IAM users in your AWS account. You might create an IAM user for someone who needs access to your AWS console, or when you have a new application that needs to make API calls to AWS. This is to add an extra layer of security to your AWS account.
In this chapter, we are going to create a new IAM user for a couple of the AWS related tools we are going to be using later.
Create User
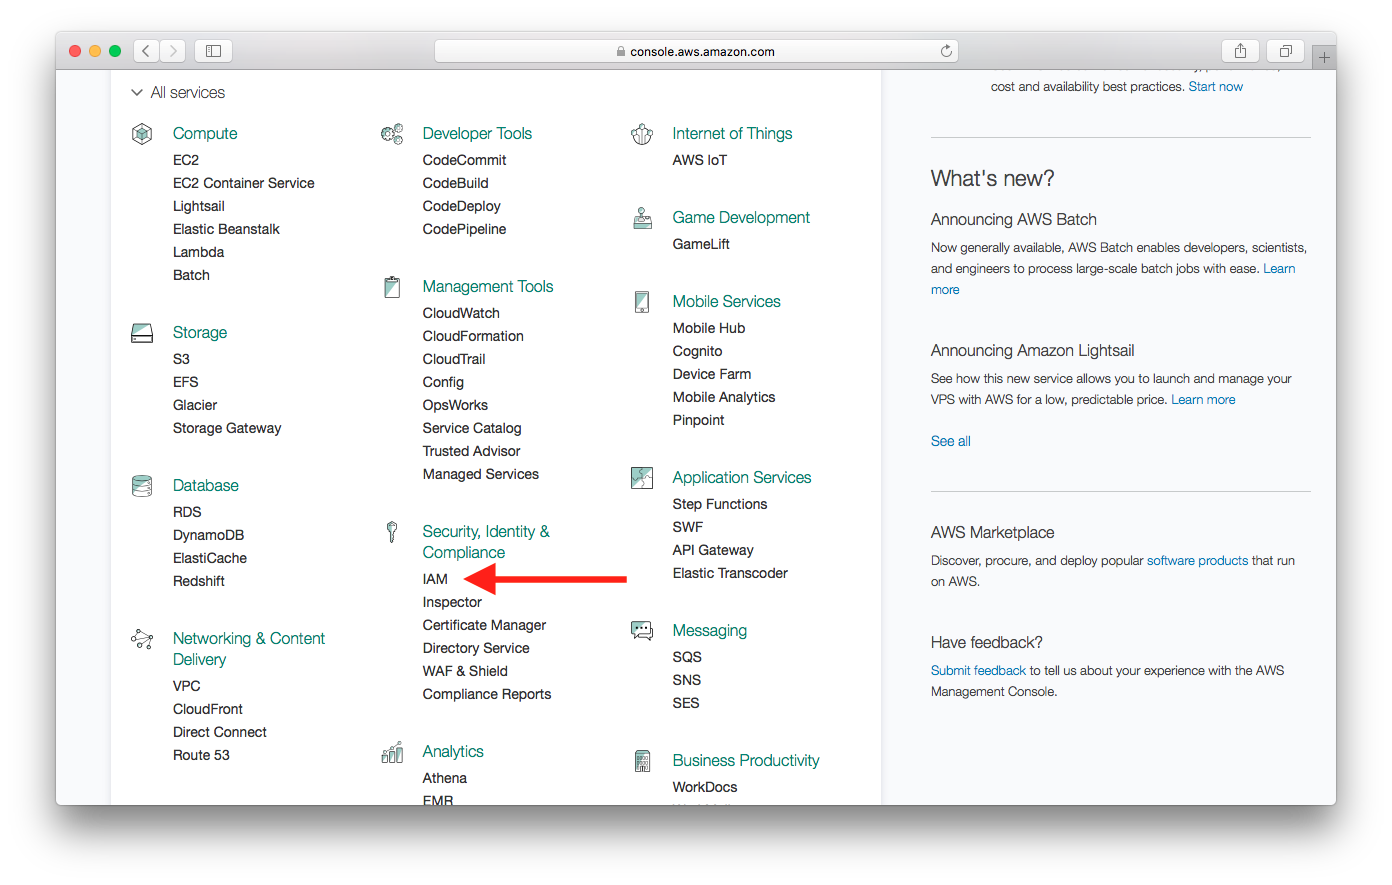
First, log in to your AWS Console and select IAM from the list of services.
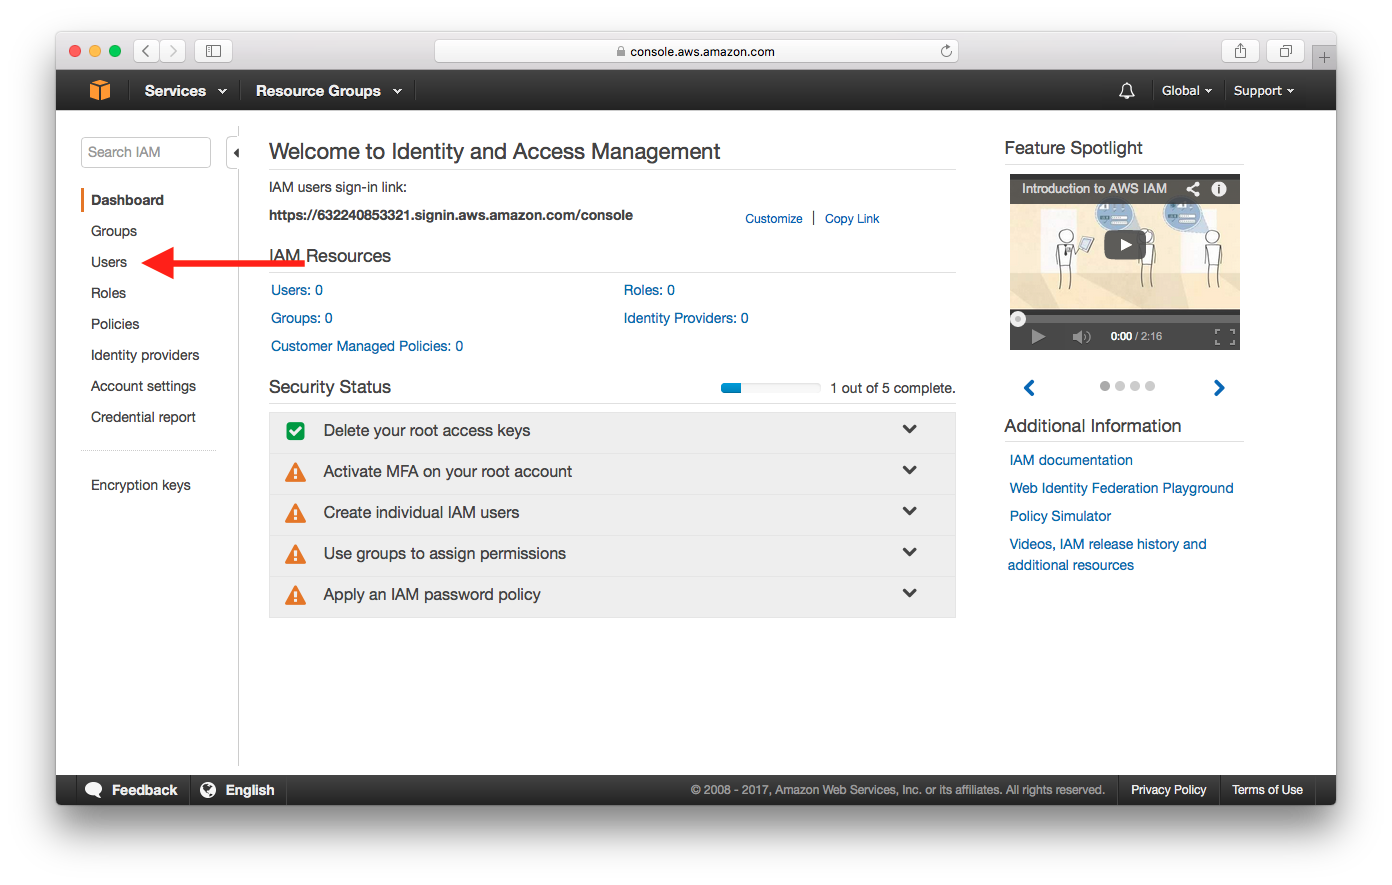
Select Users.
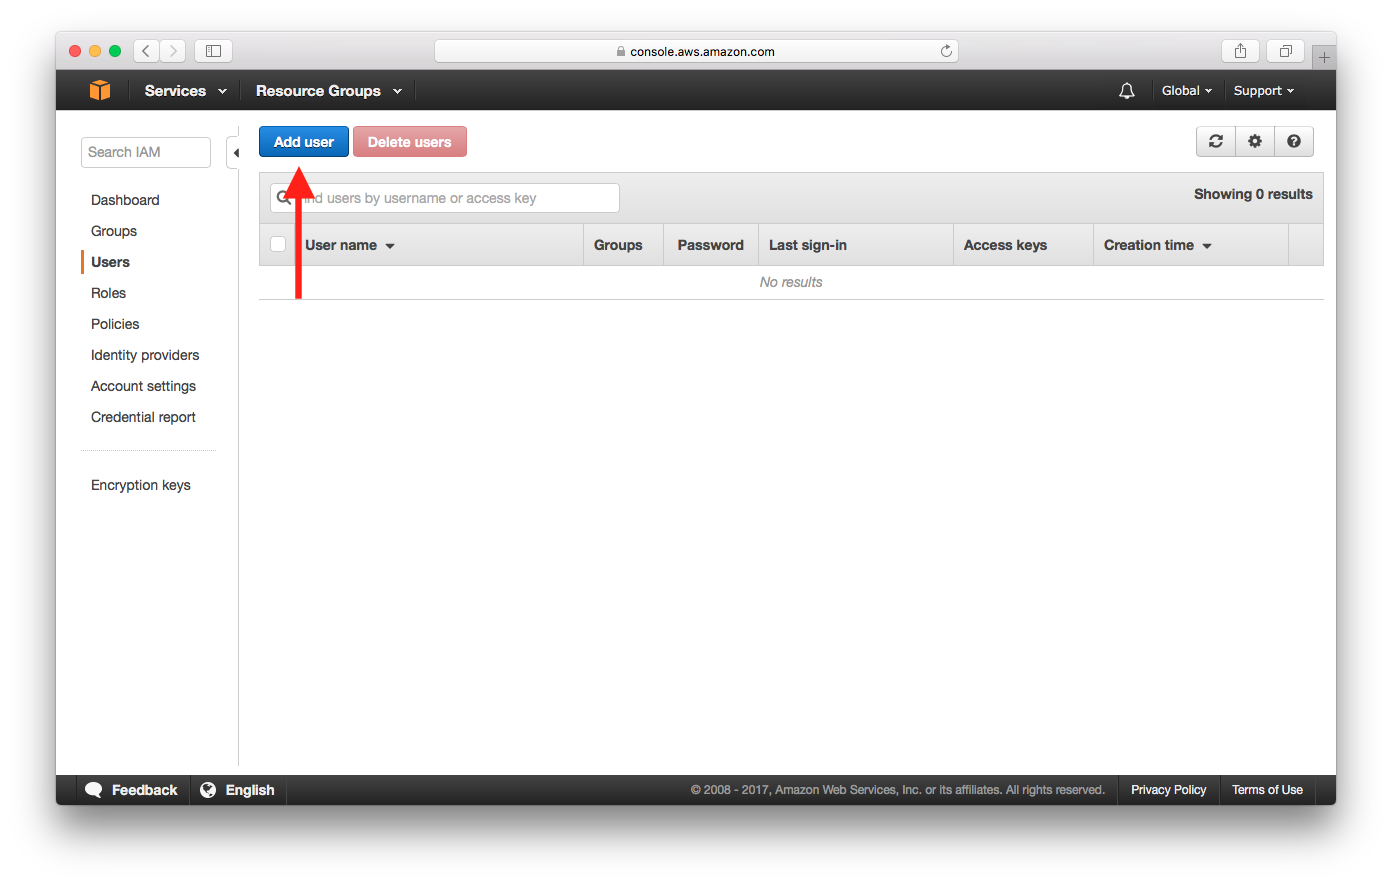
Select Add User.
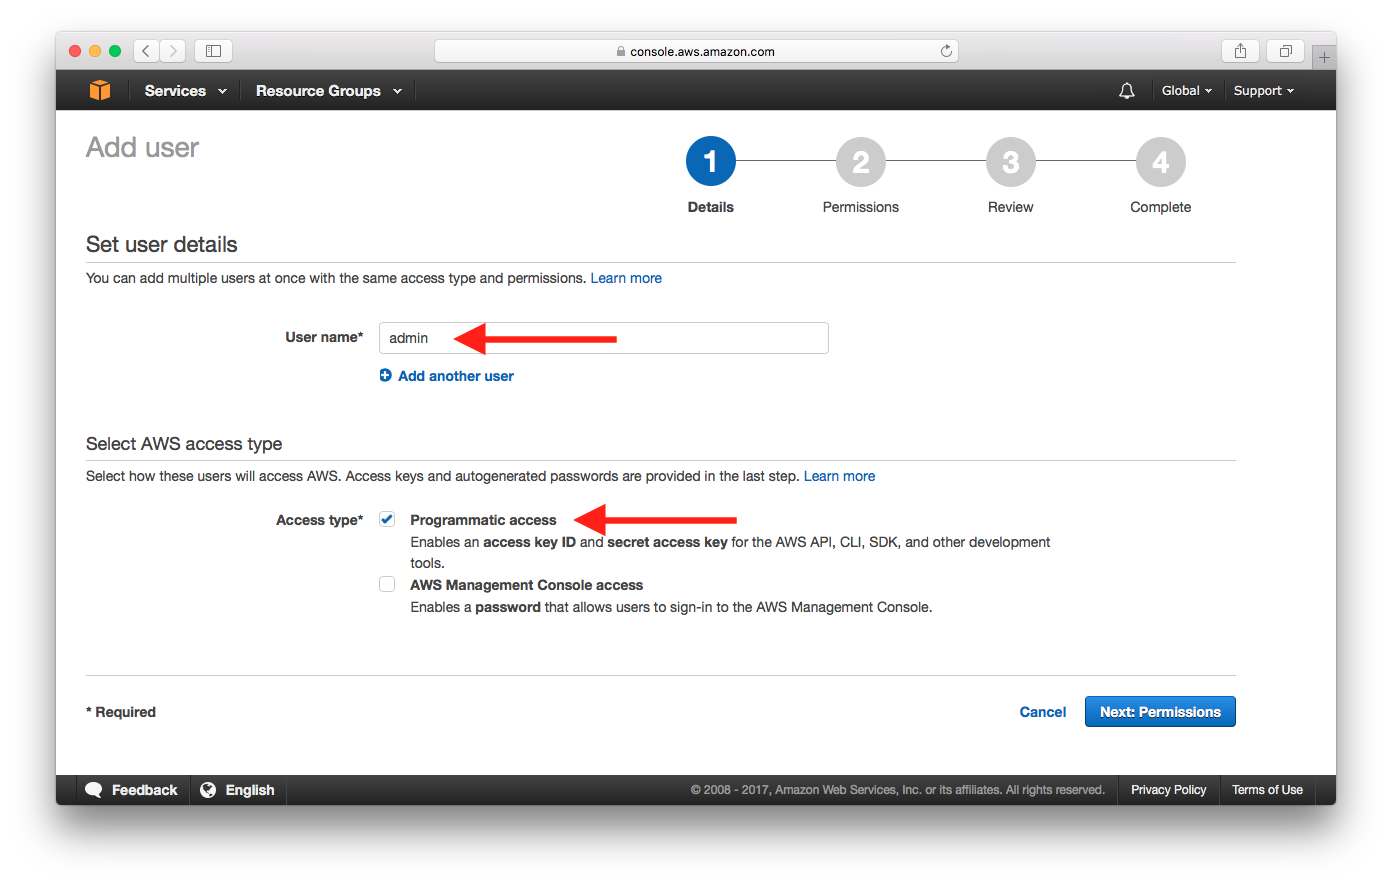
Enter a User name and check Programmatic access, then select Next: Permissions.
This account will be used by our AWS CLI and Serverless Stack Framework (SST). They’ll be connecting to the AWS API directly and will not be using the Management Console.
Select Attach existing policies directly.
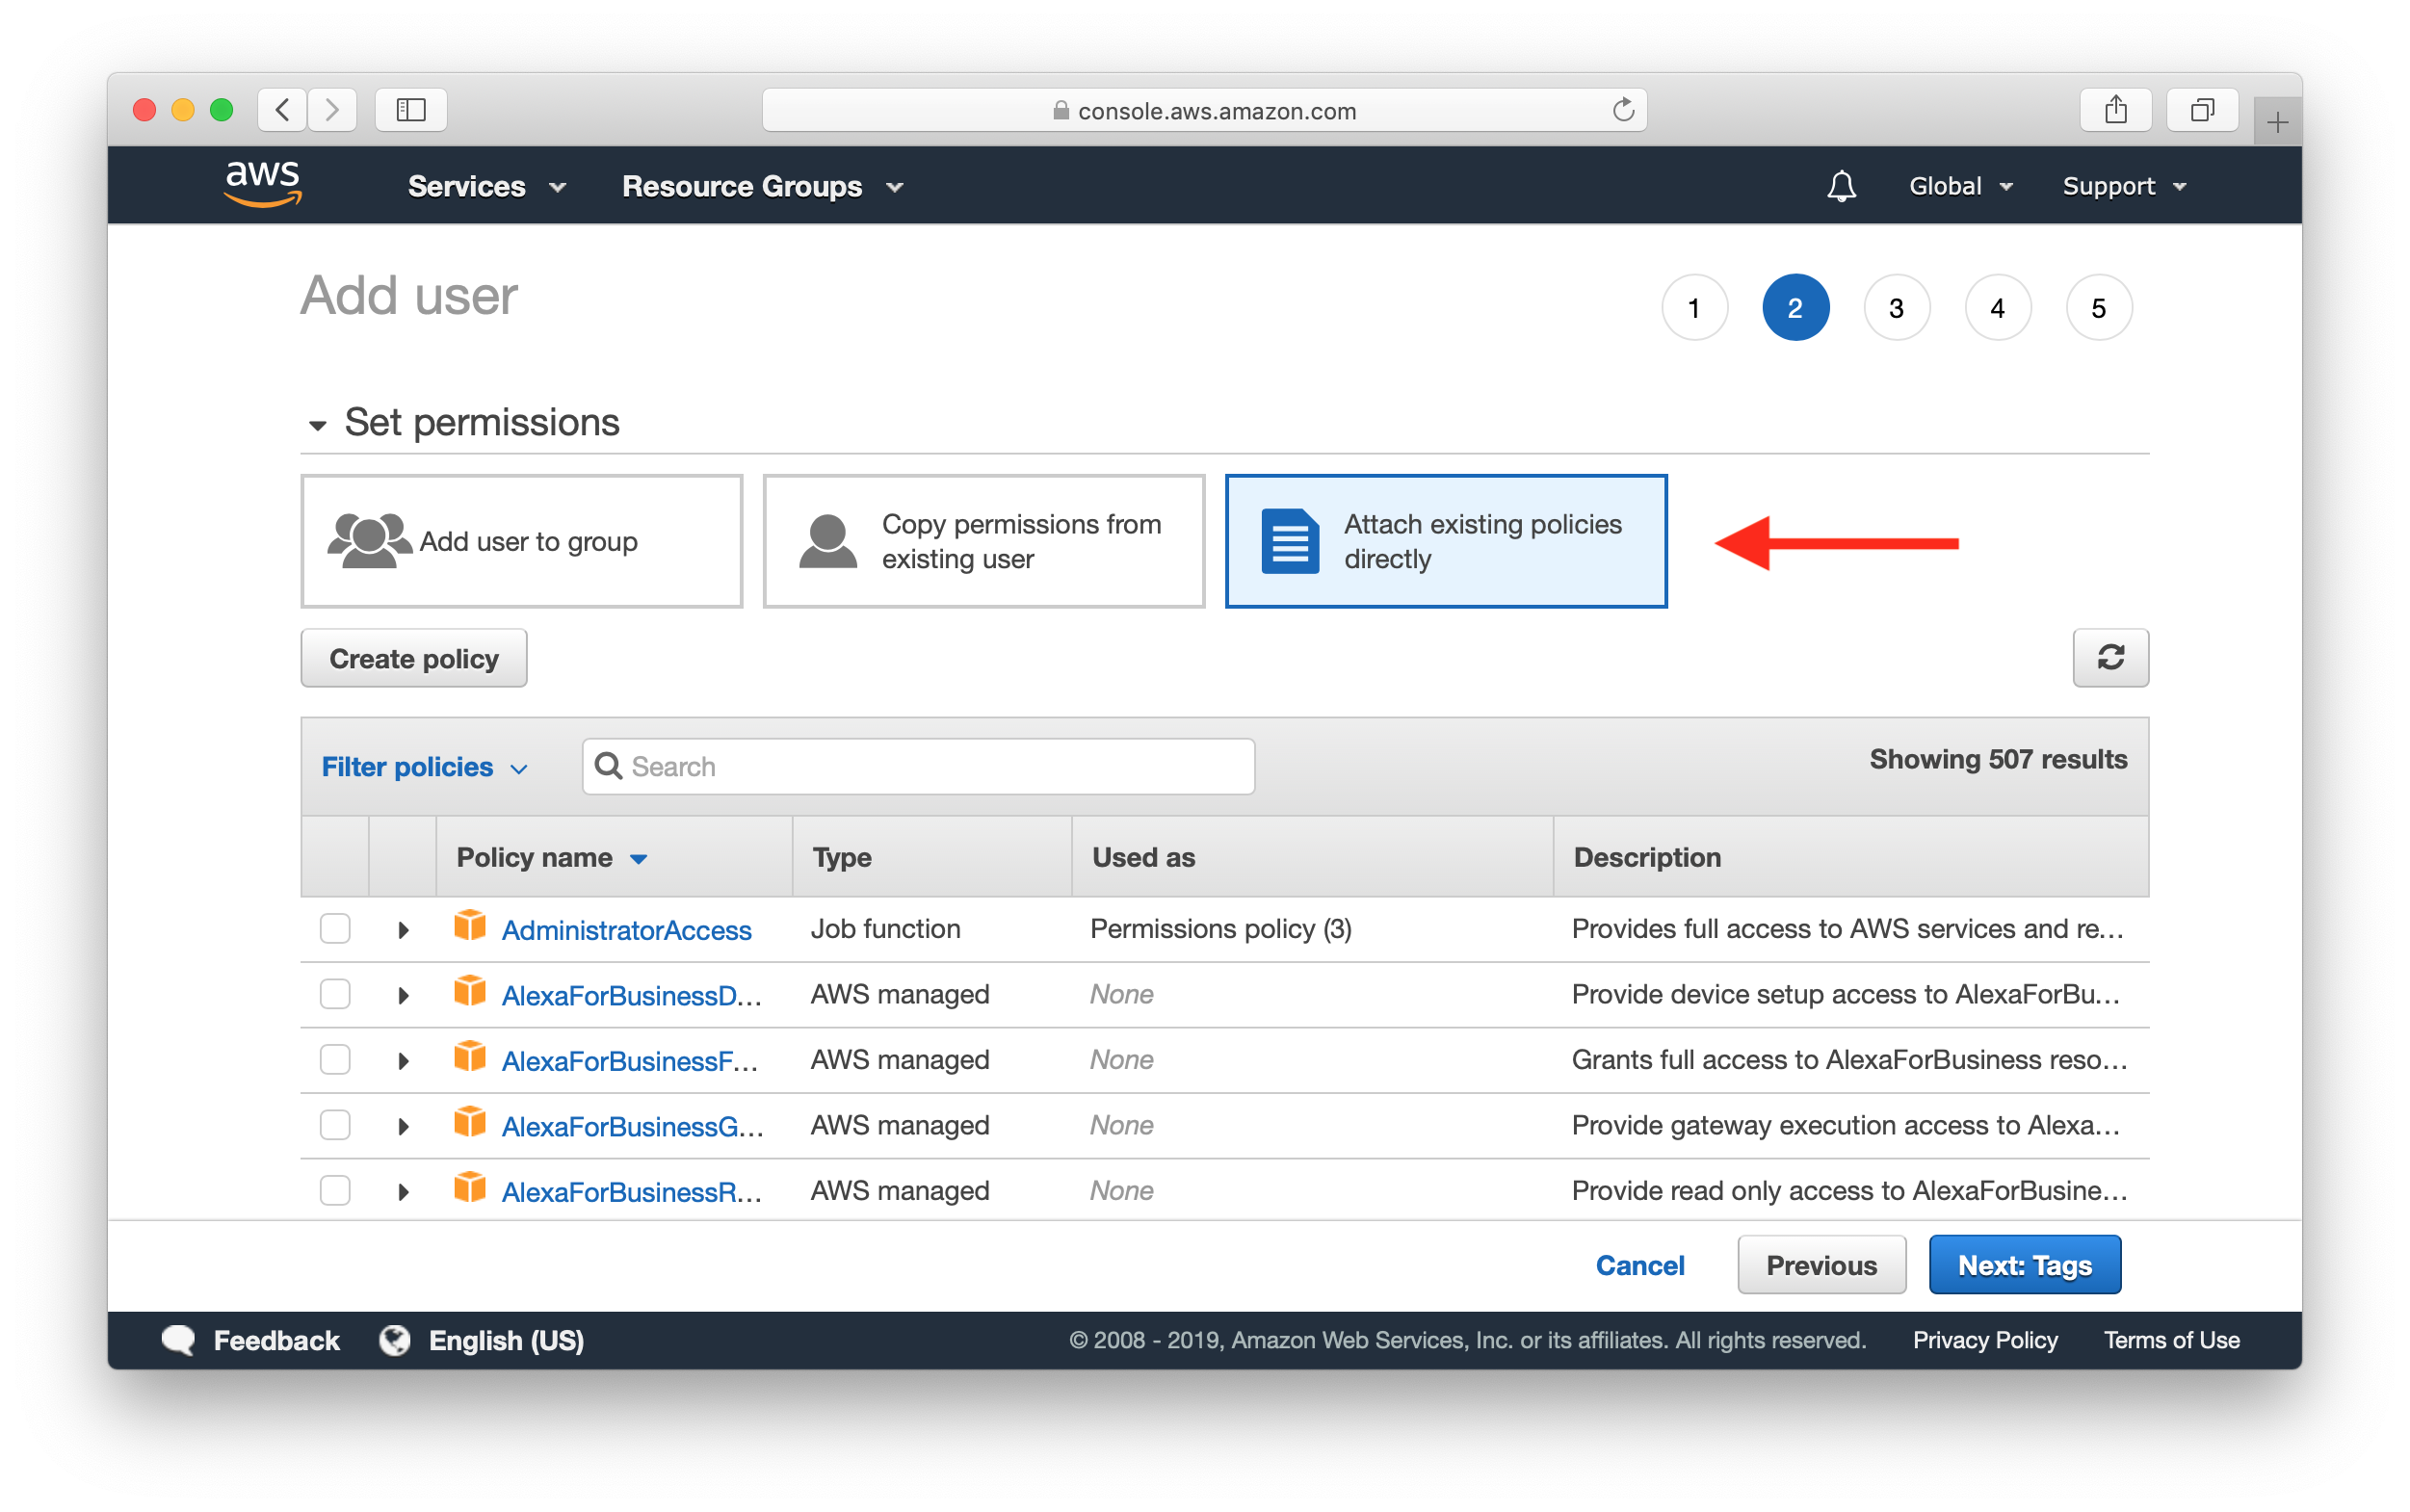
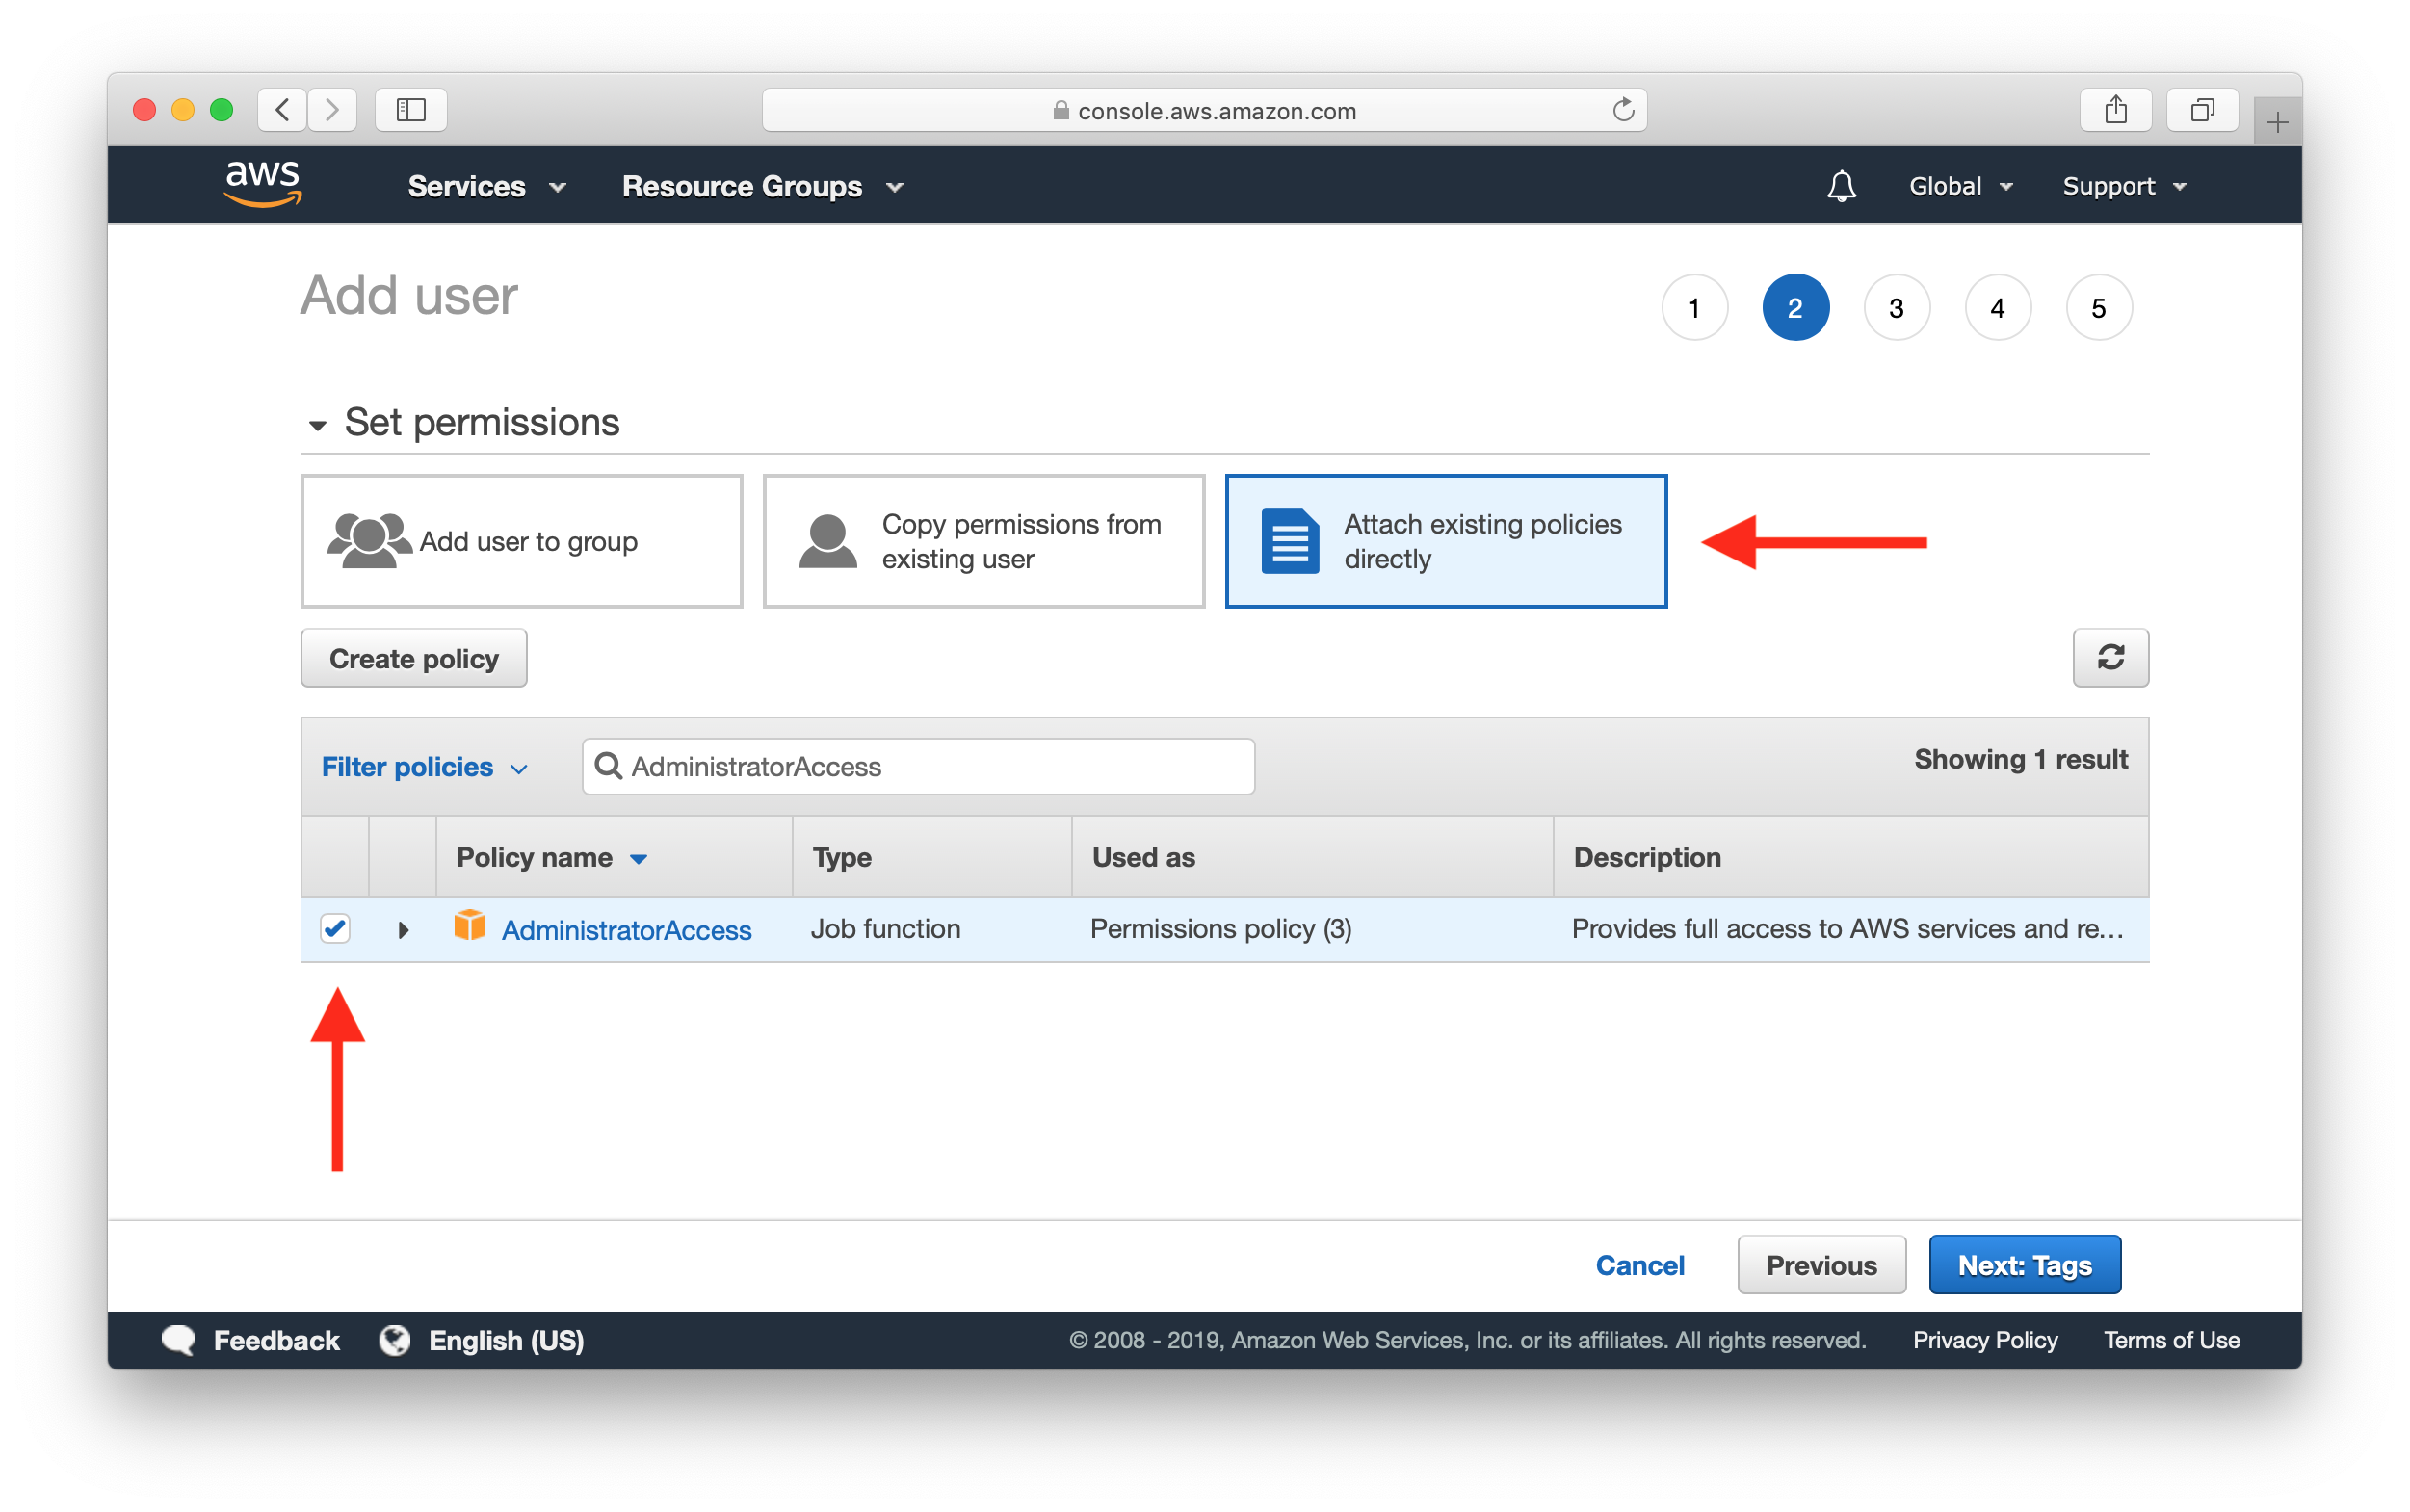
Search for AdministratorAccess and select the policy, then select Next: Tags.
We can provide a more fine-grained policy here and we cover this later in the Customize the Serverless IAM Policy chapter. But for now, let’s continue with this.
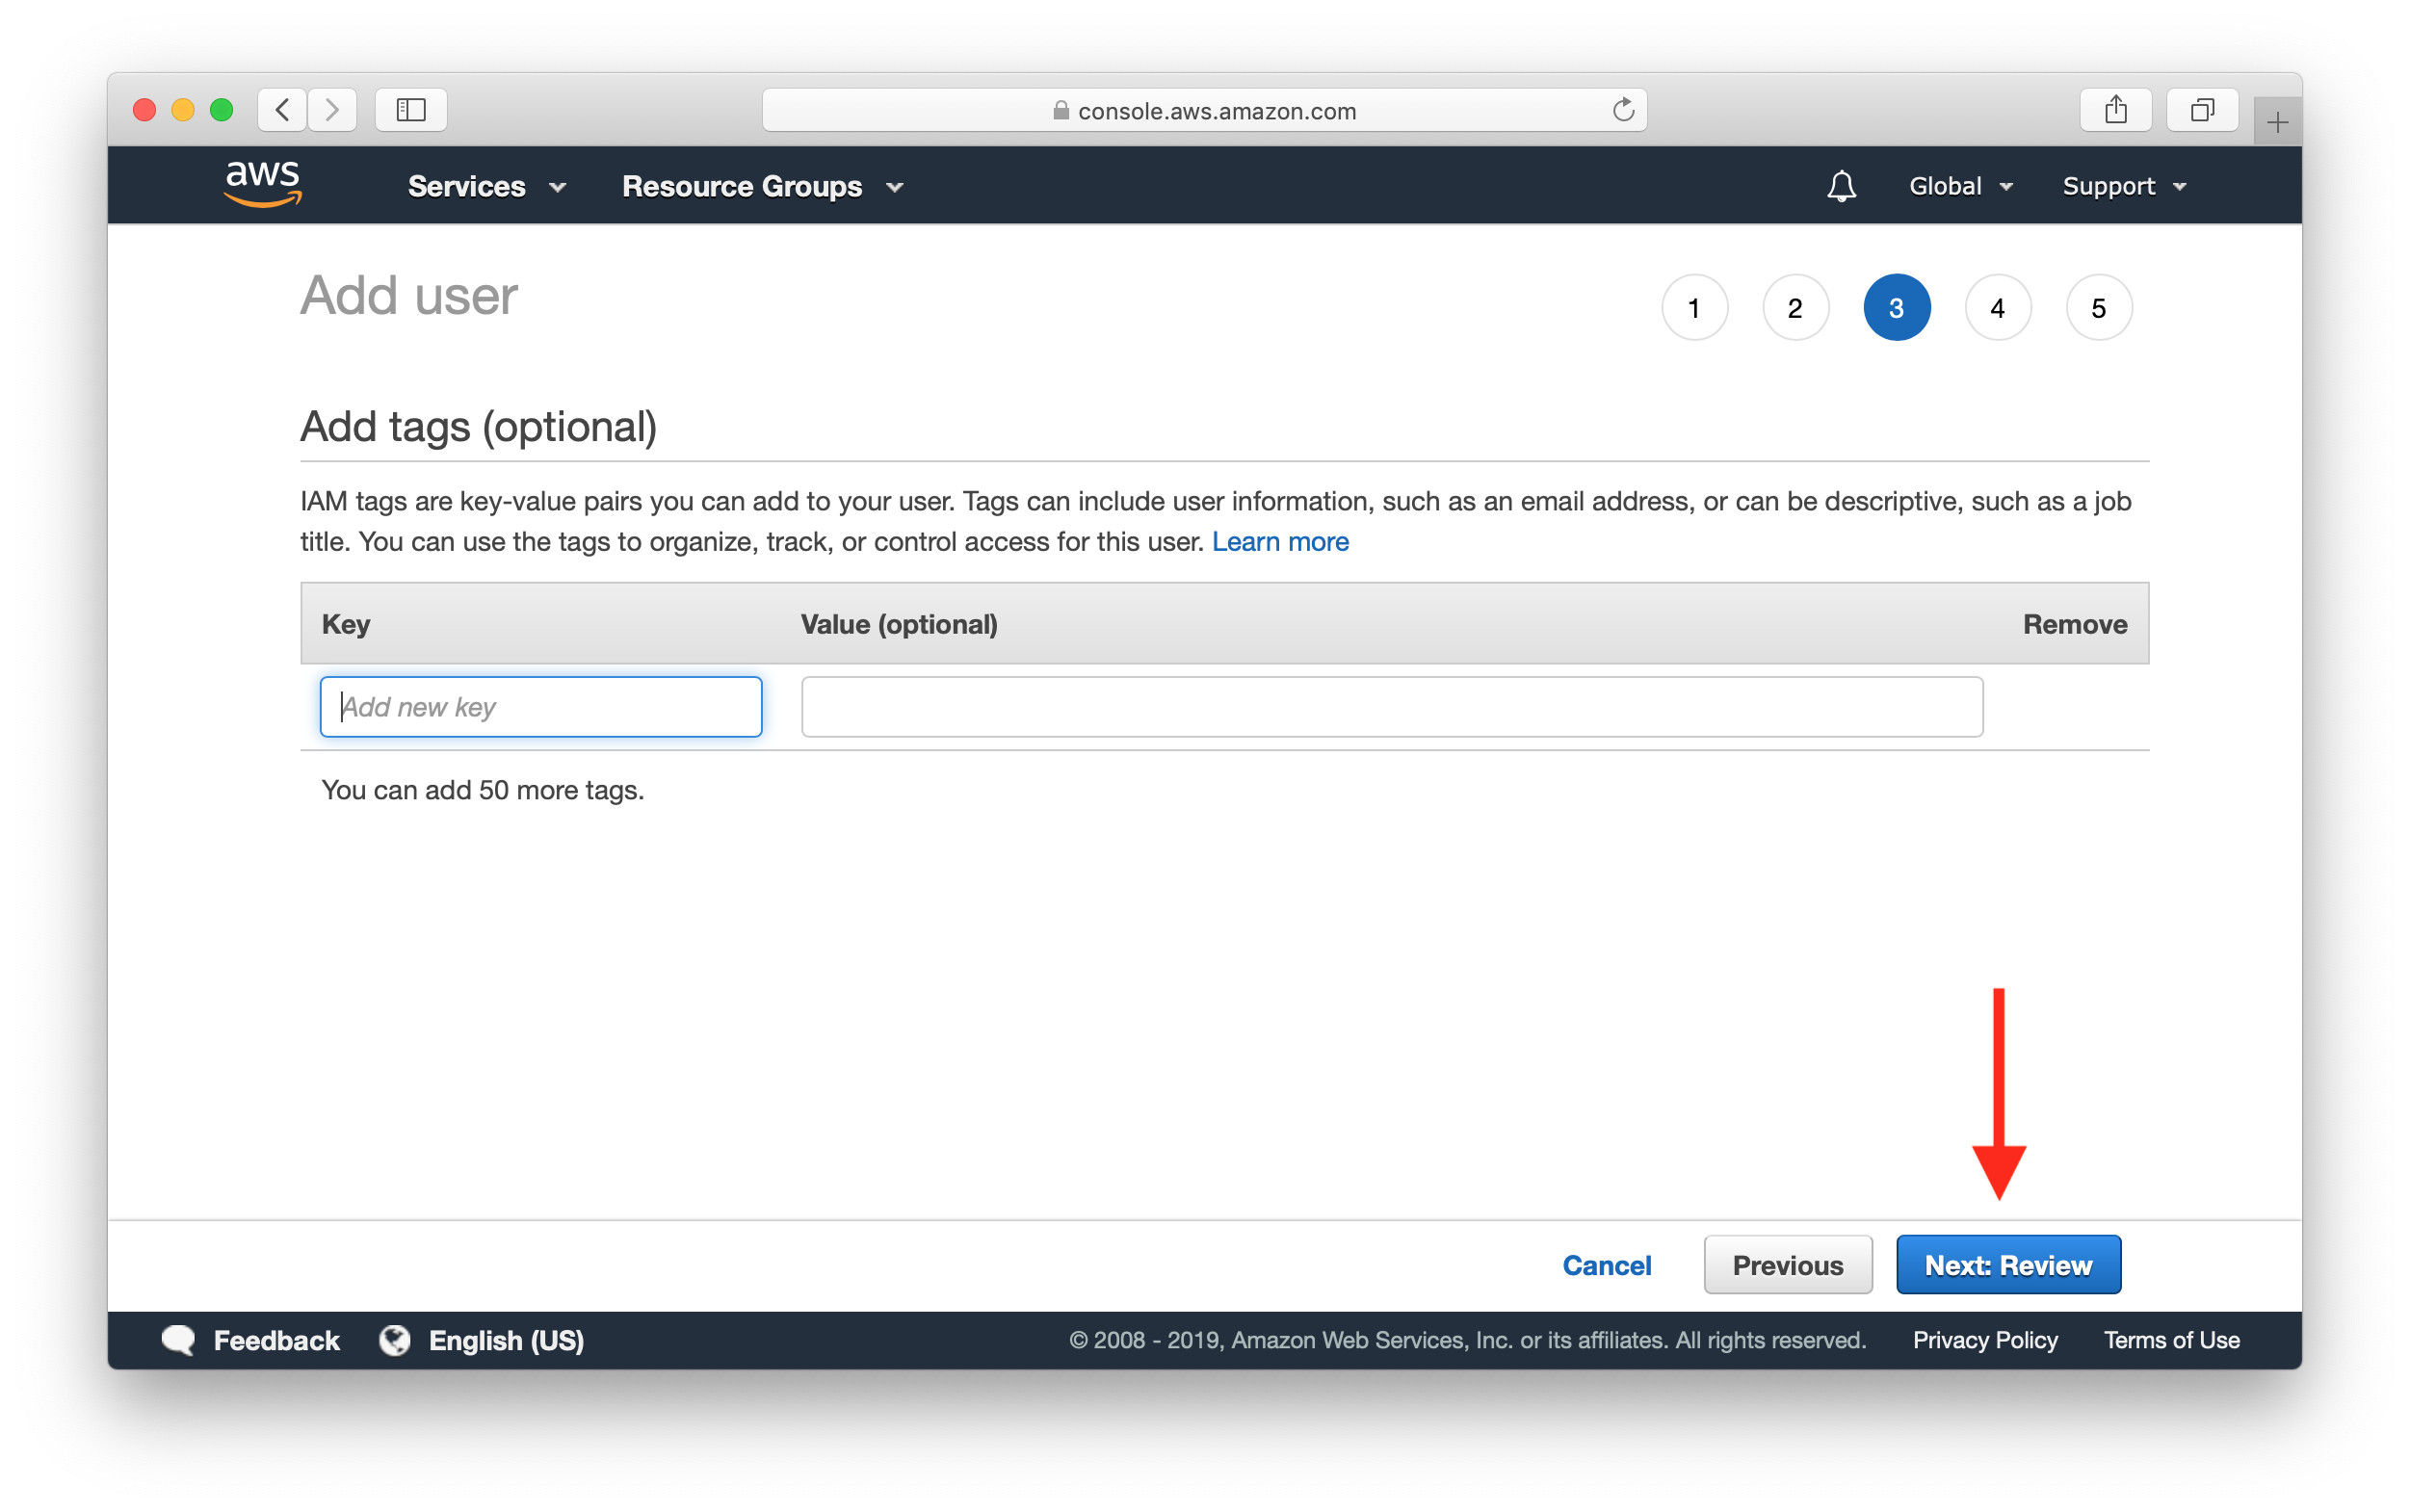
We can optionally add some info to our IAM user. But we’ll skip this for now. Click Next: Review.
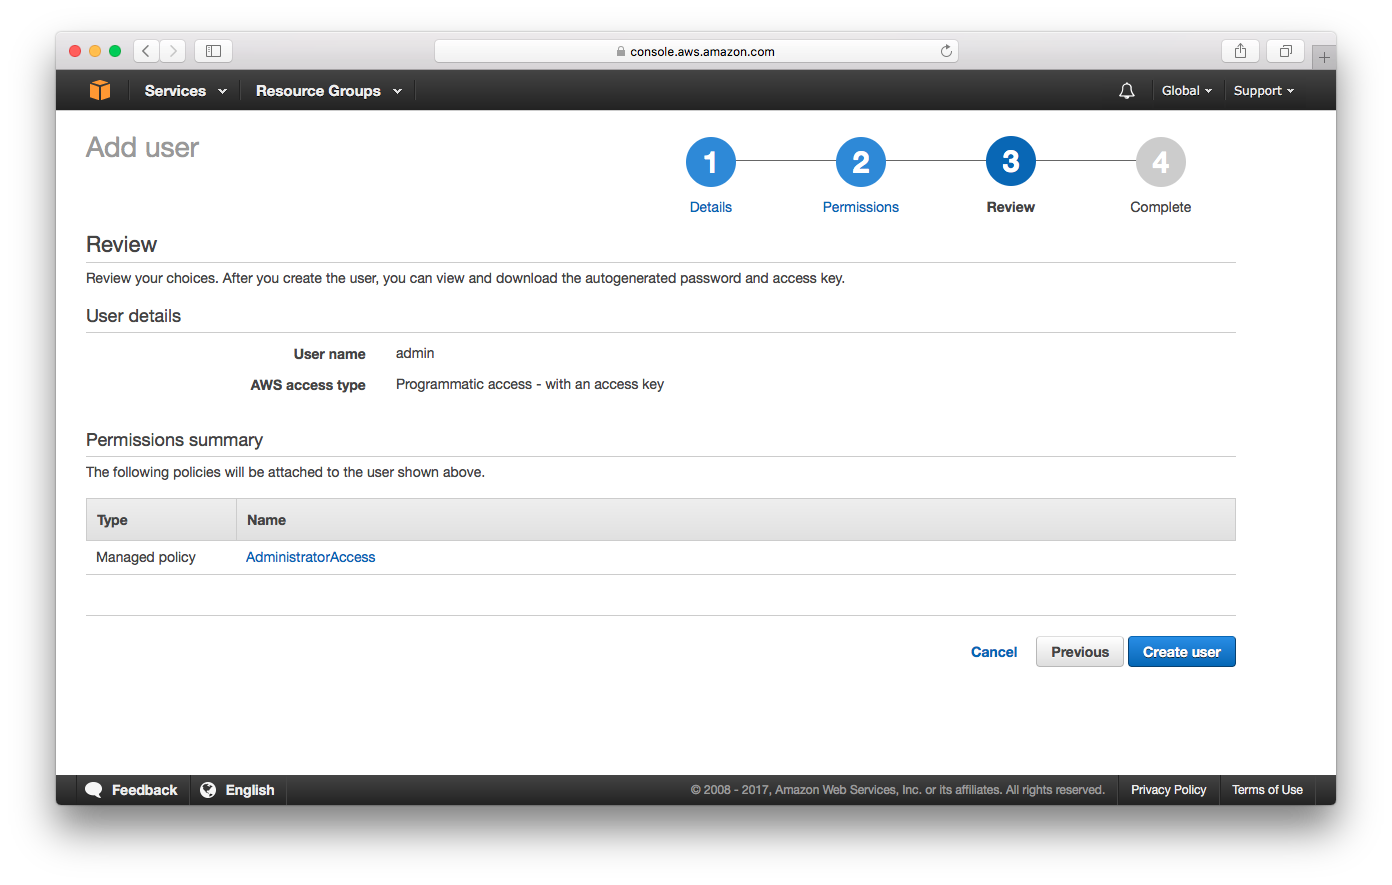
Select Create user.
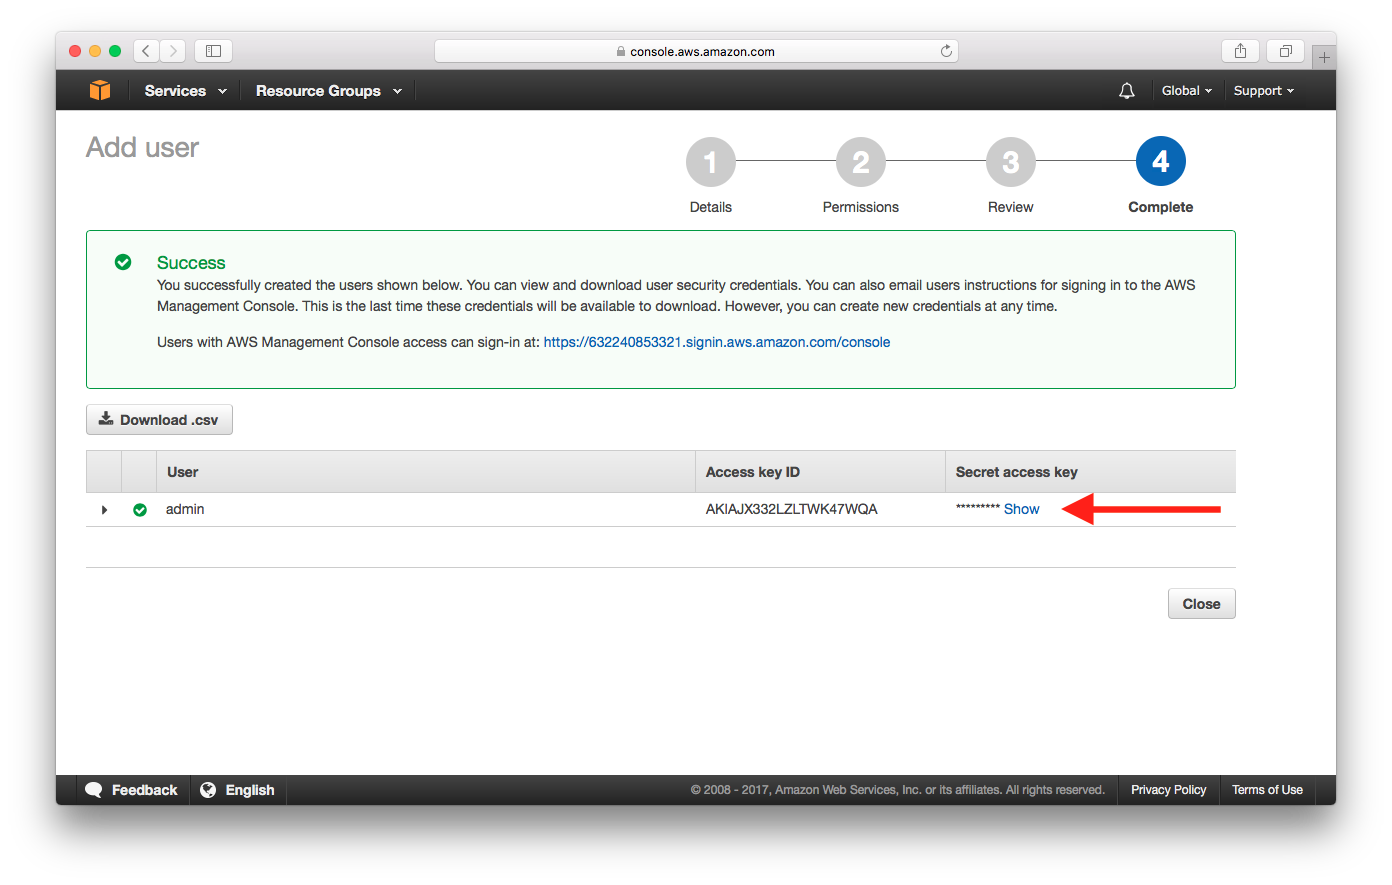
Select Show to reveal Secret access key.
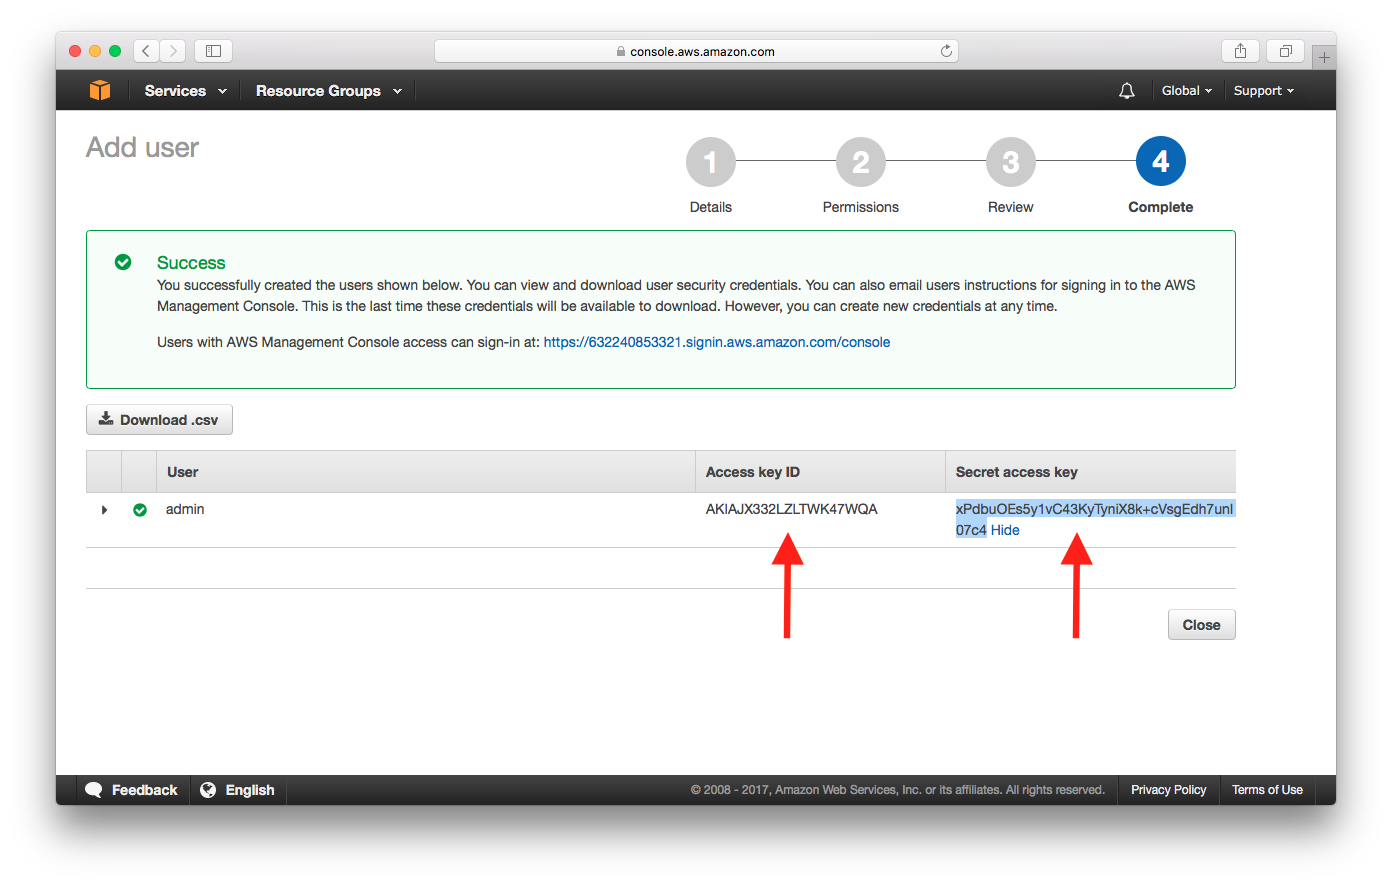
Take a note of the Access key ID and Secret access key. We will be needing this in the next chapter.
Now let’s configure our AWS CLI so we can deploy our applications from our command line.
For help and discussion
Comments on this chapter


